PVZ Fusion Strategy Guide: 15 Pro Tips to Beat All Levels & Boss Battles
Here's what most people don't realize about PVZ Fusion. Playing it like the original Plants vs Zombies will get you absolutely demolished.
I learned this the hard way after losing the same level seven times in a row, watching my carefully planned defense crumble against zombies that actually think. The hybrid system changes everything, and if you're not adapting your strategies, you're gonna have a rough time.
Why Your Old PvZ Strategies Don't Work Anymore
The original game was pretty forgiving, honestly. Plant some sunflowers, throw down peashooters in rows, add a wall-nut or two. Done. You could practically beat half the game on autopilot.
PVZ Fusion? Different beast entirely. The AI's smarter, zombies have new abilities, and your plant choices actually matter now. I've watched players with years of PvZ experience get wrecked in the first few levels because they refused to change their approach. The zombies will path around obstacles, target specific plants, and coordinate attacks in ways that feel almost unfair at first.
But here's the thing—once you understand the new mechanics, the game becomes way more satisfying.
Tip #1: Sun Economy Is Still King (But Different)
Yeah, I know you've heard this a million times. But in Fusion, sun management works differently than you think.
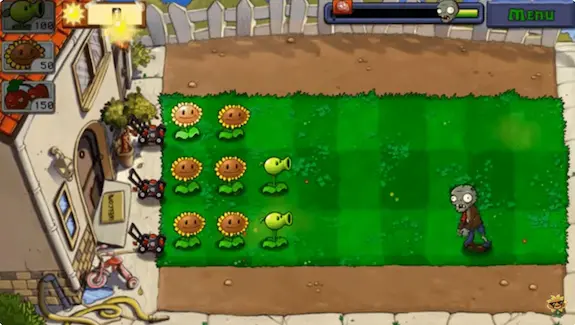
Lightning Sunflowers are broken. Seriously. They generate sun like regular sunflowers but also zap nearby zombies. This means you're getting defense AND economy in one plant slot, which is absurdly efficient in early game. I put these down first in literally every level now.
Twin Sunflowers still exist, but honestly? The hybrid options are usually better. A Sunflower-Peashooter fusion gives you steady income while providing early defense. You're not sitting there vulnerable for the first minute like in the original game.
One mistake I see constantly: players wait too long to build sun production because they're panicking about zombies. Don't. The first zombie wave is always manageable with minimal defense—prioritize economy or you'll be broke when things get serious.
Tip #2: Learn the Fusion Combos That Actually Matter
Not all hybrid plants are created equal, and some combinations are straight-up useless in most situations.
Top-tier fusions you need to know:
Flame Peashooter (Peashooter + Fire plant) does splash damage that can hit multiple zombies. Game-changer for grouped enemies. Works especially well in narrow lanes where zombies bunch up.
Ice Melonpult (Melonpult + Snow Pea) combines massive impact damage with slowing effects. Your go-to for dealing with Gargantuars and other tanky zombies. The slow effect stacks with other ice plants too, which gets ridiculous.
Toxic Mushroom (Mushroom + Toxic plant) releases poison clouds in an area. Perfect for chokepoints where zombies cluster. The damage over time effect means you're not wasting energy on zombies that are about to die anyway.
Lightning Sunflower (already mentioned, but it's that good). Economy plus offense. No-brainer.
Cactus-Cattail fusion hits flying enemies and ground units. Versatile as hell. Saves you plant slots.
Less useful fusions? Anything combining two defensive plants usually feels redundant. You're better off mixing offense with defense or economy with offense.
Tip #3: Zombie Counters Are Non-Negotiable Now
In the original PvZ, you could kinda brute-force most zombies with enough firepower. Fusion doesn't let you get away with that anymore.
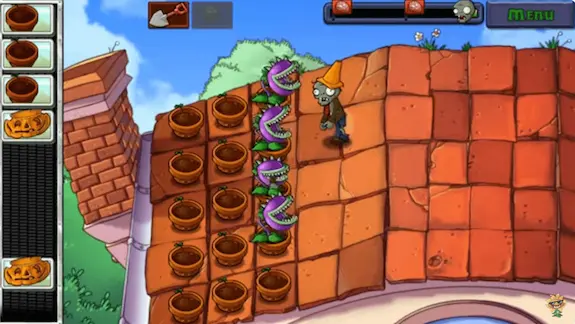
Shadow Gargantuar disables defensive plants in his path. Your Wall-nuts become useless lawn ornaments. Counter: Use offensive plants with high DPS instead of relying on walls. Ice plants slow him down while heavy hitters like Melonpults chip away his health. Place plants he hasn't reached yet—he can only disable what's directly in front of him.
Cyber Imp launches EMP attacks that temporarily shut down plants in a small area. Counter: Spread out your defenses. Don't cluster expensive plants together. Use cheap plants as EMP bait. Mushrooms work great because they're expendable and still do damage.
Frozen Miner tunnels underground and resurfaces unpredictably, bypassing your front line. Counter: Keep one or two offensive plants in your back rows. Chompers work surprisingly well here because they can instantly kill him when he pops up. Also, area-effect plants like Toxic Mushroom catch him regardless of where he surfaces.
Shield Zombie variants block frontal attacks. Counter: Lobbed projectiles (Cabbage-pult, Melon-pult) go over shields. Explosive plants damage them from behind. Split Peas hit from both directions.
You've gotta scout what zombies appear in each level and adjust your loadout accordingly. There's a preview before most levels—actually pay attention to it instead of just clicking through.
Tip #4: Lane Priority Changes Everything
Here's something that separates good players from great ones: understanding which lanes need the most attention.
Bottom and top lanes are usually safer because zombies tend to spawn more in center lanes. You can get away with lighter defenses here, especially early on. Save your expensive plants for lanes two, three, and four.
But—and this is crucial—some levels flip this logic. Boss battles often spawn adds in outer lanes specifically because players ignore them. Always check spawn patterns in the first wave before committing to a strategy.
I usually go heavy defense in the middle lane, moderate in lanes above and below it, and lighter defenses on the edges. This creates a strong core that handles most threats while not wasting resources on lanes that see less action.
Tip #5: Plant Positioning Matters More Than You Think
Don't just spam plants in a grid pattern and hope for the best.
Offensive plants should be staggered, not lined up. If you put all your Peashooters in column three, an EMP attack or special zombie ability wipes out your entire offense at once. Spread them across columns 2-4 for redundancy.
Defensive plants work best when they create natural chokepoints. Place Wall-nuts offset from each other so zombies have to path around them, buying more time for your shooters to do work.
Area-effect plants (like Toxic Mushroom) should cover zones where zombies naturally cluster—usually just behind your defensive plants. This maximizes their damage potential.
Economy plants (Sunflowers and variants) go in back rows, obviously. But here's a trick: place them offset in columns 7-8 instead of all the way back. This gives you room for emergency defensive plants if something breaks through your front line.
One layout I use constantly: Sunflowers in column 8, offensive plants staggered in columns 3-5, defensive plants in column 2 with gaps, and one or two "cleanup" plants in columns 6-7 to catch anything that sneaks through. Adjust based on level requirements.
Tip #6: Don't Sleep on Mushrooms (Seriously)
Most players ignore mushrooms because they associate them with night levels only. Big mistake.
Mushrooms are incredibly cost-efficient in PVZ Fusion. The Toxic Mushroom hybrid I mentioned earlier? Cheap to deploy and does consistent area damage. Doom-shroom variants (if your version has them) can clear entire waves in emergencies.
Even basic mushrooms work as cheap, expendable defenders that zombies waste time eating. Sometimes quantity beats quality—six mushrooms cost less than two Peashooters and provide similar total damage output.
For night levels, mushrooms become even more essential. Stock your loadout with at least three mushroom types for these stages.
Tip #7: The Plant Food Meta (If Your Version Has It)
Not all PVZ Fusion versions include Plant Food, but if yours does, using it correctly separates wins from losses.
Don't waste Plant Food on basic plants. A powered-up Peashooter is nice but not game-changing. Save it for:
- Melonpults during boss phases for massive burst damage
- Wall-nuts when your defense is about to break for emergency tanking
- Toxic plants when zombies cluster for huge area damage
- Sun-producing plants when you're desperate for economy
I usually hold onto Plant Food until I see a critical moment—like a Gargantuar approaching with low health, or three zombies about to reach my last defensive line. Using it proactively (rather than reactively) rarely pays off.
Tip #8: Boss Battle Strategies That Actually Work
Boss fights are where most players hit a wall. These aren't just tankier zombies—they have phases, special abilities, and attack patterns you need to learn.
General boss strategy:
Scout the boss's abilities in phase one. Most bosses telegraph their special attacks—watch for animations or sound cues. Learn these patterns because you'll see them again.
Build economy aggressively before the boss arrives. You want maximum sun income by the time phase two starts because that's when things get chaotic.
Keep at least two lanes heavily defended. Bosses often summon adds (additional zombies) that swarm from multiple directions. If you focused everything on the boss lane, these adds will overwhelm you from the sides.
Use burst damage plants for boss phases. Melonpults, Citrons (if available), and other heavy hitters chunk boss health faster than rapid-fire plants. DPS matters more than consistency here.
Specific boss tips:
Shadow Gargantuar (if he's a boss in your version): Spam ice plants to keep him permanently slowed. His plant-disabling ability is less threatening if he never reaches your defense. Use lobbed projectiles since he can't disable what he can't touch.
Zombot variations: Target the cockpit/weak points when exposed. Don't waste damage during invulnerable phases—use that time to rebuild defenses and clean up adds. Save your most powerful plants for when weak points appear.
Multi-phase bosses: Conserve resources during early phases. The final phase is always the hardest. If you blow all your sun and Plant Food in phase one, you'll be broke when the boss hits his enrage mode.
Tip #9: Level-Specific Loadout Optimization
Here's a mistake I made for weeks: using the same loadout for every level. Doesn't work.
For levels with flying zombies: Always bring Cattail hybrids or Cactus. Non-negotiable. I've lost levels because I forgot to include anti-air and watched balloons float right past my defense.
For levels with lots of Imps: Bring area-effect plants. Imps are weak individually but swarm in groups. Toxic Mushroom, Snapdragon, or any splash damage plant makes short work of them.
For underwater/pool levels: Obviously bring aquatic plants, but also remember that Lily Pads eat up sun. Plan your economy around this—you'll need more sun producers than ground-only levels.
For conveyor belt levels: You can't choose plants, so strategy shifts to prioritization. Plant sun producers first if they appear, defensive plants second, offense third. Adapt to what the conveyor gives you rather than forcing a predetermined strategy.
For limited-sun levels: Cheap plants become crucial. Mushrooms, basic Peashooters, and cost-efficient hybrids only. Skip expensive plants entirely—you can't afford them anyway.
Always check level modifiers before starting. Some levels restrict plant types, limit sun production, or have special zombie compositions. Your loadout needs to reflect this or you're fighting uphill.
Tip #10: The "Flexible Defense" Approach
Static defenses get punished hard in Fusion. You need to adapt mid-level based on what zombies are doing.
Keep 300-500 sun in reserve for emergency plants. Don't spend every bit of sun the second you earn it. That reserve lets you respond to unexpected threats—like a sudden Gargantuar spawn or zombies tunneling to your back line.
Dig up underperforming plants. If a lane isn't seeing much action, shovel up plants there and redeploy them where they're needed. This is especially useful in longer survival modes where zombie patterns shift.
Watch for zombie spawn patterns and adjust. If you notice tons of zombies clustering in lane three, reinforce it immediately. Don't wait for your defense to break—be proactive.
Have a backup plan for your backup plan. What happens if your Wall-nut gets eaten? If your main offensive plant gets disabled? If a zombie gets past your front line? Think two steps ahead instead of reacting to problems after they happen.
Tip #11: Survival Mode Secrets
Survival mode is where PVZ Fusion really tests your skills. Endless waves, increasing difficulty, limited resources.
Early survival strategy: Build economy first, defense second, offense third. You need sustainable sun income to last long-term. Rush offense and you'll run out of resources by wave 10.
Mid-game survival: Start upgrading to more powerful hybrid plants. Swap out basic Peashooters for Flame Peashooters. Replace regular Sunflowers with Lightning Sunflowers. This gradual power increase helps you scale with difficulty.
Late-game survival: Focus on area-effect damage and crowd control. Single-target plants can't keep up with the sheer number of zombies anymore. Toxic clouds, explosions, and splash damage become essential.
The key is knowing when to transition between these phases. Too early and you're broke. Too late and you're overwhelmed.
Tip #12: Challenge Mode Tricks
Challenge modes restrict your options—limited plants, no sun, specific plant types only, etc. These need specialized strategies.
No-sun challenges: You get a fixed amount of sun at the start. Every plant placement matters. Go for high-impact plants over quantity. One Melon-pult beats three Peashooters in this mode.
Limited plant selection: Work with what you're given instead of wishing for your favorite plants. Sometimes a basic Cabbage-pult is better than no plant at all. Adapt.
Speed challenges: Plant placement speed matters more than optimal positioning. Good-enough-now beats perfect-in-two-minutes-when-you've-already-lost. Practice your plant menu navigation to place things faster.
No casualties challenges: One zombie reaching the house = instant failure. Play ultra-conservative. Over-defend rather than risk it. Better to win ugly than lose stylishly.
The frustrating part about challenge modes? They require trial and error. You'll probably fail a few times learning the gimmick. That's normal—don't get tilted.
Tip #13: Zen Garden Actually Matters Now
In the original PvZ, Zen Garden was basically a decoration that occasionally gave you money. In Fusion, it's genuinely useful.
Plants you grow in Zen Garden can be upgraded and then used in main levels. These upgraded versions have better stats—more damage, faster shooting, longer range, etc. This compounds over time, making difficult levels significantly easier.
Prioritize upgrading plants you use most frequently. For me, that's Lightning Sunflowers, Flame Peashooters, and Ice Melonpults. Getting these to max level makes a noticeable difference in your clear speed.
Time investment is minimal too. Check your garden once per play session, water plants that need it, collect rewards. Five minutes tops. The long-term payoff is worth it.
Tip #14: Learn From Your Losses (No, Really)
Most players lose a level and immediately restart with the same strategy. Then they lose again. And again.
Stop doing this.
When you lose, ask yourself: Why did you lose? Did zombies overwhelm a specific lane? Did you run out of sun? Did a boss ability catch you off-guard? Did you mismanage plant placement?
Then adjust your strategy based on that answer. If lane three got overwhelmed, add more defense there. If you ran out of sun, bring more sun producers next attempt. If a boss ability wrecked you, plan around it.
I started keeping mental notes of problem areas in levels. "This level spawns tons of Shield Zombies in lane two" or "Boss uses his area attack every 30 seconds." These observations turned frustrating losses into easy wins on the next attempt.
Tip #15: Practice Plant Placement Speed
Here's something nobody talks about: placement speed matters in PVZ Fusion more than the original game.
Zombies are faster, waves are more aggressive, and you have less downtime between spawns. If you're slowly scrolling through your plant menu looking for the right one, zombies are already halfway across the lawn.
Practice quick-planting in low-stakes levels. Learn your plant menu hotkeys if playing on PC. Get muscle memory for your most-used plants so you can place them without thinking.
During intense waves, don't aim for perfect placement—close enough is fine. A Peashooter in a slightly suboptimal position beats a perfect Peashooter that you placed too late.
This seems minor, but in boss fights or survival mode, those extra seconds add up. Fast placement means more plants on the field, which means more damage, which means you win.